

is here! Shop now, pay later in 4 easy installments
DeliveryNZ-wide
DHT20 Temperature & Humidity Sensor – I2C, 3.3V or 5V, 4-Pin to Pinterest (opens in a new window)

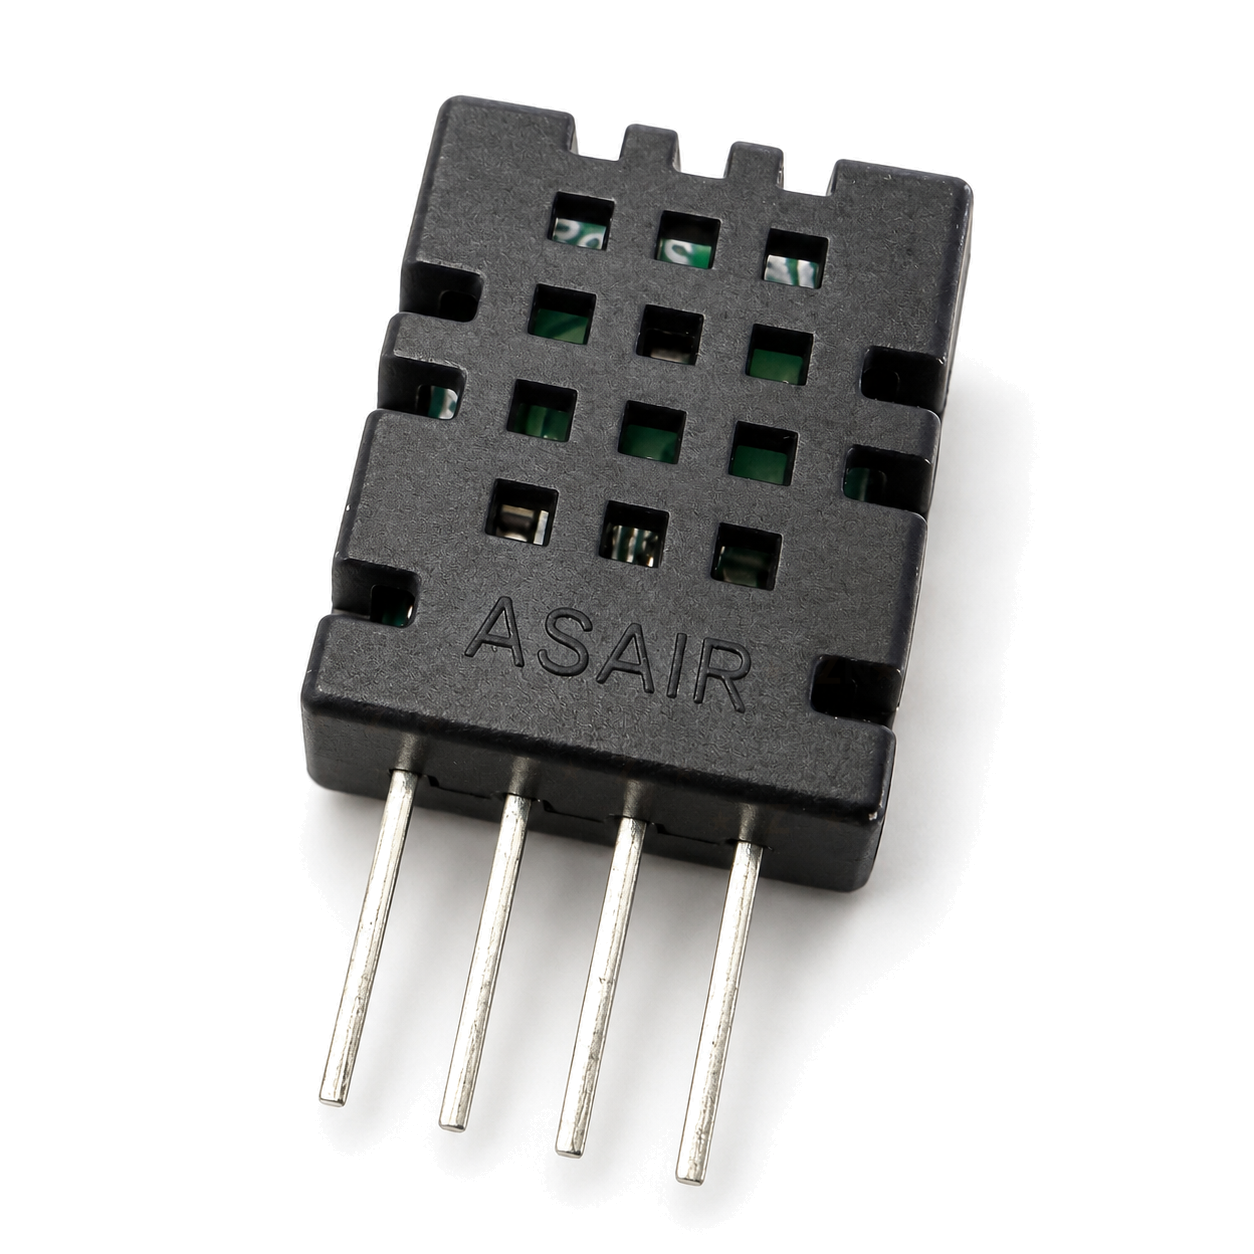
DHT20 Temperature & Humidity Sensor – I2C, 3.3V or 5V, 4-Pin

$4.95 incl. gst

SKU: CLICK-IT-301754 Category:

Verified specifications

Brand
ASAIR

Taken from this product's published details. If something is not listed here, it has not been verified.

Ask AI about this product

Answers use this product's information and the store's details. If it cannot be confirmed, it will point you to our team.

Any language. Press Enter to ask

Frequently bought together

Bundle idea: this item plus 2 recommended accessory/accessories, $15.88 in total. Add each item to the cart below.

Description

The DHT20 is a calibrated temperature and humidity sensor in the familiar 4-pin DHT housing, with a digital I2C output instead of the DHT11’s single-wire signal. It runs on 3.3V or 5V, sits at I2C address 0x38 and reads with standard Arduino, ESP32, ESPHome and Raspberry Pi libraries. If you want a single data wire instead, see our DHT22 / AM2302 module with the pull-up fitted, or the low-cost bare DHT11.

Specifications

SensorDHT20, AHT20-class chip, factory calibrated
InterfaceI2C, fixed address 0x38, up to 400 kHz
Supply2.2 to 5.5V, works on 3.3V and 5V boards
Humidity0 to 100% RH, ±3% RH typical
Temperature-40 to 80°C, ±0.5°C typical
Pinout1 VDD, 2 SDA, 3 GND, 4 SCL (grille towards you, pins down)
Pull-ups4.7k on SDA and SCL if your bus has none (not included)
Size12.6 x 16.1 x 5.8 mm body, 7.2 mm pins at 2.54 mm pitch
Reading rateOne reading every 2 seconds or slower

Datasheets

What’s in the box

1×
DHT20 temperature and humidity sensor

Bare 4-pin sensor in an anti-static bag. Pull-up resistors and wires are not included.

Great for

Room temperature and humidity in Home Assistant via ESPHome
Upgrading a DHT11 project to calibrated I2C readings
Checking bathroom or wardrobe humidity before mould sets in
Greenhouse and seed-raising humidity logging
Showing temperature and humidity on an I2C OLED
Battery-powered loggers that sleep between readings

Wiring & getting started

  1. Find the pins

    Hold the sensor with the vented grille towards you and the pins pointing down. From left to right the pins are 1 VDD, 2 SDA, 3 GND and 4 SCL. SDA and SCL are not side by side, so check them twice.

  2. Power it from your board’s logic voltage

    On an Arduino Uno or Nano connect VDD to 5V, SDA to A4 and SCL to A5. On an ESP32 connect VDD to 3.3V, SDA to GPIO21 and SCL to GPIO22. GND goes to GND on both.

  3. Add pull-ups if the bus needs them

    If nothing else on the I2C bus has pull-up resistors, fit 4.7k from SDA to VDD and from SCL to VDD. A 100nF capacitor across VDD and GND, close to the sensor, keeps the supply clean.

  4. Read it

    In the Arduino IDE install the DHT20 library by Rob Tillaart, or Adafruit AHTX0, and open its example. In ESPHome use the aht10 platform with variant AHT20. Wait at least 2 seconds between readings.

Note: The DHT20 uses I2C, so it is not a drop-in swap for a DHT11 or DHT22 in existing code or wiring. Hand solder only, briefly, and give the sensor a day or two in normal room air afterwards before trusting the humidity reading.


Additional information

Brand

ASAIR

Reviews

There are no reviews yet.

Only logged in customers who have purchased this product may leave a review.

We’d love to hear what you think!