
is here! Shop now, pay later in 4 easy installments
DeliveryNZ-wide
TPS63070 Buck-Boost Converter Module 2-16V to 3.3V, 5V or 9V – 3.3V to Pinterest (opens in a new window)

TPS63070 Buck-Boost Converter Module 2-16V to 3.3V, 5V or 9V – 3.3V

$10.01 incl. gst

SKU: CLICK-IT-798842 Category:

Verified specifications

Brand
NZN Electronics

Taken from this product's published details. If something is not listed here, it has not been verified.

Ask AI about this product

Answers use this product's information and the store's details. If it cannot be confirmed, it will point you to our team.

Any language. Press Enter to ask

Frequently bought together

Bundle idea: this item plus 2 recommended accessory/accessories, $28.85 in total. Add each item to the cart below.

Description

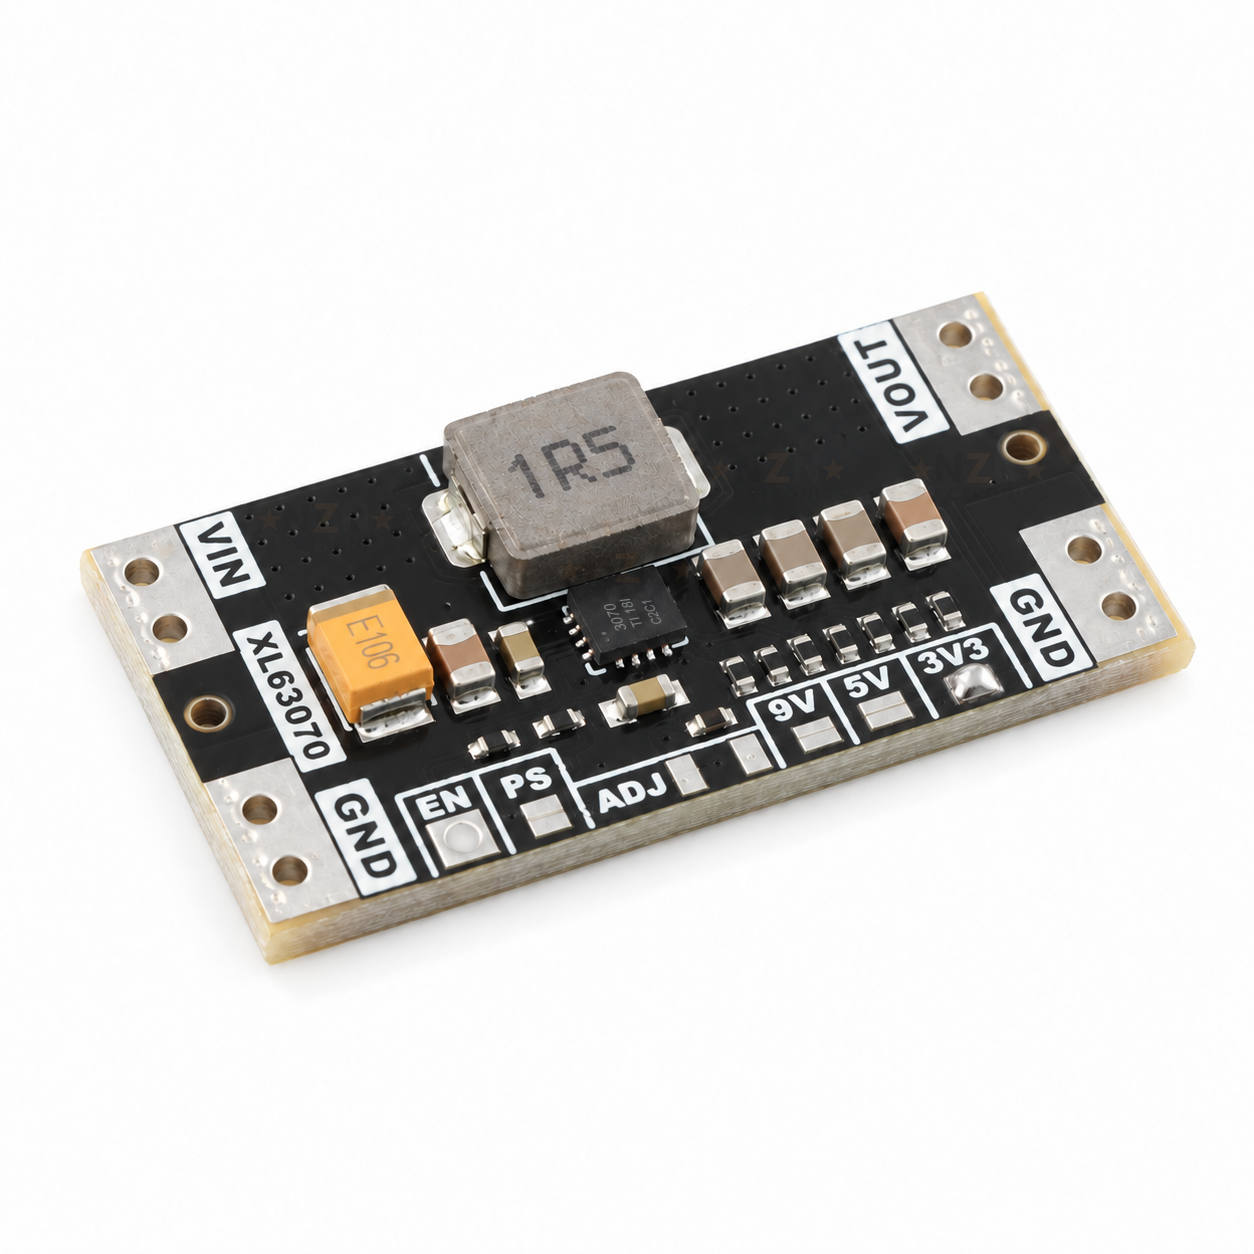
A small buck-boost converter built on the Texas Instruments TPS63070. It takes any DC input from 2V to 16V and holds a steady 3.3V, 5V or 9V output, whether the input is above or below that voltage. That makes it a good fit for battery projects, where a Li-ion cell runs from 4.2V down to 3V and a plain step-up or step-down module would drift out of regulation. Each version has a fixed output, so choose 3.3V, 5V or 9V when you order.

Specifications

Converter chipTI TPS63070 buck-boost
Input voltage2V to 16V DC (starts from about 3V)
Output voltageFixed 3.3V, 5V or 9V (choose version)
Output currentUp to 2A when stepping down, less when boosting (see FAQs)
Switching frequency2.4MHz typical (chip)
No-load current54µA typical (chip)
EfficiencyUp to 95% (chip datasheet)
ConnectionsVIN, VOUT and 2 x GND pads, plus EN and PS
Board size30 x 16 mm

Datasheets

What’s in the box

1×
TPS63070 buck-boost module

Set to the output voltage you choose. Bare board, no wires or headers fitted.

Great for

Running an ESP32 at 3.3V from one 18650 cell
A steady 5V for an Arduino or USB device from a Li-ion pack
Powering a 9V device from a 12V battery or a 2-cell pack
Low-ripple power for sensors and audio boards

Wiring & getting started

  1. Check the version

    The bridged solder pad in the 9V / 5V / 3V3 row shows the output voltage. Only one pad is bridged.

  2. Connect the input

    Solder your supply to VIN and the GND pad beside it. Keep the input between 3V and 16V, and check polarity before power-up.

  3. Connect the load

    Wire your load to VOUT and the GND pad beside it. All GND pads are joined on the board.

  4. Leave EN and PS open

    EN is pulled up on the board, so the module runs as soon as it has power. Connect EN to GND to switch the output off. PS can stay open for the lowest ripple.

Note: The chip limits its input current while the output is starting up. If the output does not come up with a heavy load attached, especially on the 9V version, power up with the load reduced and then connect it.
Additional information

Brand

NZN Electronics

Reviews

There are no reviews yet.

Only logged in customers who have purchased this product may leave a review.

We’d love to hear what you think!