

Description
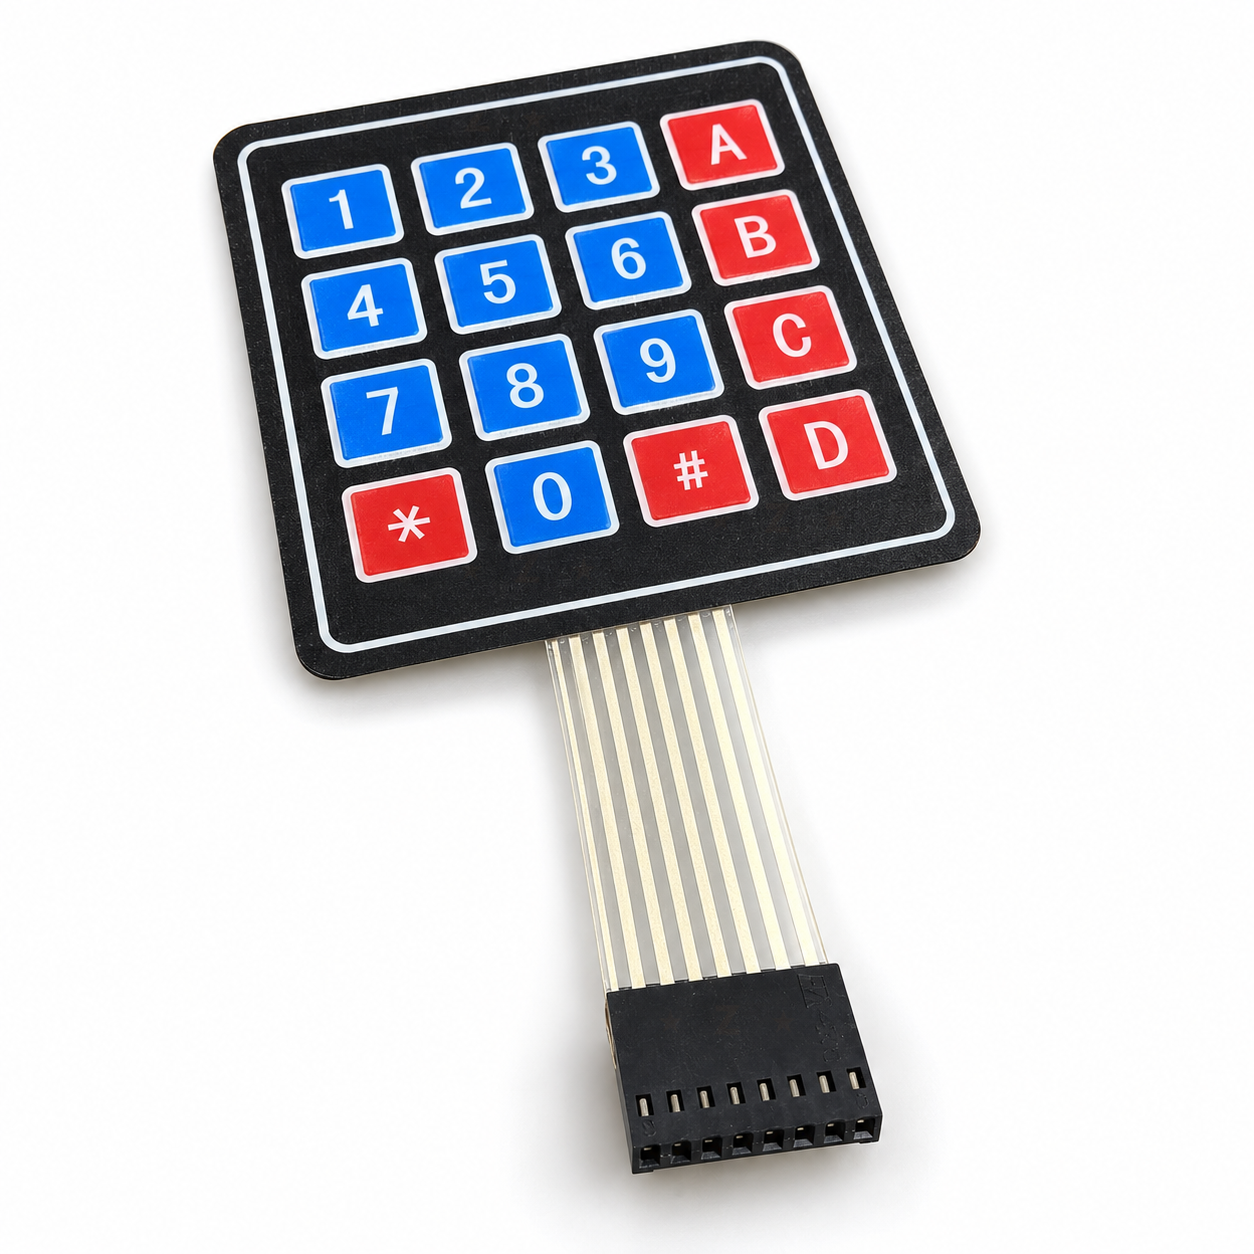
A 4×4 membrane matrix keypad with 16 keys (0 to 9, A to D, * and #) for adding number entry, a PIN code or a simple menu to an Arduino, ESP32 or Raspberry Pi Pico project. It is a passive switch matrix, so it works with both 3.3V and 5V boards, plugs onto male header pins or male jumper wires through its 8-pin 2.54mm connector, and has a peel-off adhesive back for mounting on a box or panel.
Specifications
Datasheets
What’s in the box
With its flat tail and 8-pin connector fitted, adhesive liner on the back.
Great for
Wiring & getting started
-
Connect the 8 pins
With the keys facing you and the tail pointing down, pin 1 is the right-hand socket, marked 1 on the connector. Start from that socket and work leftwards: on an Uno or Nano, run keypad pins 1 to 8 to D9, D8, D7, D6, D5, D4, D3 and D2 with male-to-male jumper wires. No resistors or power wires are needed.
-
Install the Keypad library
In the Arduino IDE, open the Library Manager, search for Keypad and install “Keypad by Mark Stanley, Alexander Brevig”.
-
Test it
Copy the short test sketch from the Quick Start guide above (rowPins {9, 8, 7, 6}, colPins {5, 4, 3, 2}), choose your board and port, and upload. Open the Serial Monitor at 9600 baud: each key you press prints once.
-
Mount it
Peel the liner and press the keypad onto a clean, flat surface. Pass the tail through a slot instead of folding it hard at the edge.
Note: On an ESP32, avoid GPIO 34 to 39 (input only, no pull-ups) and the boot pins 0, 2, 12 and 15. Any other eight general pins work.







Reviews
There are no reviews yet.